
Objective-Cの勉強を始めてまだ一ヶ月にも満たないのですが、CocoaPodsのPodライブラリを開発&公開してみたくなり、西暦から和暦に変換するライブラリを書いて公開しました。コード的には微妙な箇所が多いですが、まずはライブラリ公開をゴールとしたかったので改善は後回しとします。
Podライブラリは今までGitHubのPull Requestで追加していたのですが、ちょうど一週間前より仕様変更がありまして、TrunkというAPIサービスを利用して追加する方式にかわりました。使ってみたのですが、驚くほど簡単でしたので公開方法についてまとめます。
CocoaPodsライブラリ登録までの流れ
初めて登録する場合は下記の通りとなります。1番、5番は2回目以降は不要となります。
-
pod lib create #{library_name}
-
ライブラリの追加
-
.podspecファイルの修正
-
pod lib lint
-
pod trunk register #{email} #{your_name} —description=‘#{description_of_this_account}’
-
pod trunk push #{podspec_name_path}
それでは各コマンドについて説明します。
pod lib create #{library_name}
CocoaPodsライブラリのひな形を作ります。
pod lib create [!] A name for the Pod is required.
Usage:
$ pod lib create NAME [TEMPLATE_URL]

  Creates a scaffold for the development of a new Pod according to the CocoaPods
  best practices. If a `TEMPLATE_URL`, pointing to a git repo containing a
  compatible template, is specified, it will be used in place of the default one.
Options:
--silent    Show nothing
--verbose   Show more debugging information
--no-ansi   Show output without ANSI codes
--help      Show help banner of specified command
実行すると下記の構成でひな形が作成されます。Pod登録時に必須となるLICENSEファイルも自動で作られるのでおすすめです。
$ pod lib create Foo
Cloning https://github.com/CocoaPods/pod-template.git into Foo.
Configuring Foo template.
To learn more about the template see https://github.com/CocoaPods/pod-template.git.
To learn more about creating a new pod, see http://guides.cocoapods.org/making/making-a-cocoapod.
$ tree Foo/
Foo/
├── Assets
├── CHANGELOG.md
├── Classes
│ ├── ios
│ └── osx
├── Example
│ └── Podfile
├── Foo.podspec
├── LICENSE
├── README.md
└── Rakefile
5 directories, 6 files
ライブラリの追加
Classes内に実装したヘッダー、実装ファイルを追加してコミットしてください。登録するファイルはコミットされていないと大正となりません。
.podspecファイルの修正
ライブラリの作成者やリポジトリの場所などの情報をまとめた.podspecファイルを修正します。下記は先日自分が公開した西暦から和暦に変換するPodライブラリの一例です。
Pod::Spec.new do |s| s.name = “JapaneseCalendarYear” s.version = “0.0.1” s.summary = “Calculate japanese calendar year from current year.” s.homepage = ”https://github.com/hypermkt” s.license = “MIT” s.author = { “hypermkt” => ”#{email}” } s.social_media_url = ”https://twitter.com/hypermkt” s.platform = :ios s.source = { :git => ”https://github.com/hypermkt/JapaneseCalendarYear.git”, :tag => s.version.to_s } s.source_files = “Classes/*.{h,m}” s.requires_arc = true end
pod lib lint
Pod公開前にバリデーションチェックを行います。LICENSEファイルがあるか、.podspecファイルの文法は正しいか、リモートリポジトリは存在するかなどのチェックがされます。ソースコードはリモートリポジトリ基準となりますので、ローカルで修正したらpush後にlintしてください。
pod lib lint
-> JapaneseCalendarYear (0.0.1)
JapaneseCalendarYear passed validation.
pod trunk register #{email} #{your_name} —description=‘#{description_of_this_account}’
初回はユーザーアカウント登録が必要となるので、下記コマンドを実行します。
pod trunk register #{email} hypermkt —description=‘My Laptop’ [!] Please verify the session by clicking the link in the verification email that has been sent to #{email}
実行すると下記確認メールが登録メールアドレス宛に届きますので、確認用URLをクリックしてください。クリックすれば登録完了です。
Hi hypermkt,
Please confirm your registration with CocoaPods by clicking the following link:
https://trunk.cocoapods.org/sessions/verify/#{key} If you did not request this you do not need to take any further action.
Kind regards, the CocoaPods team
pod trunk push #{podspec_name_path}
pushコマンドでPodを登録します。驚くことに下記コマンドを1回実行するだけで完了です。
pod trunk push JapaneseCalendarYear.podspec Validating podspec -> JapaneseCalendarYear (0.0.1)
- Data URL: https://raw.githubusercontent.com/CocoaPods/Specs/9aed9c8857ec20f00f5cee8cfc73e68c502bfe70/Specs/JapaneseCalendarYear/0.0.1/JapaneseCalendarYear.podspec.json
- Log messages:
- May 25th, 22:57: Push for `JapaneseCalendarYear 0.0.1’ initiated.
- May 25th, 22:57: Push for `JapaneseCalendarYear 0.0.1’ has been pushed (1.104098643 s).
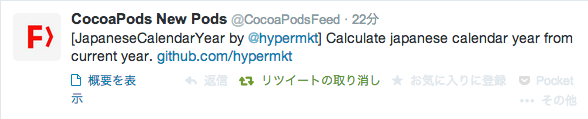
正常に処理されるとすぐにCocoaPods公式よりすぐにツイートされ、ライブラリがリポジトリに登録されます。
実際にPodfileに記述してpod installするとインストールできた!!!
pod install Analyzing dependencies Downloading dependencies Installing JapaneseCalendarYear (0.0.1) Generating Pods project Integrating client project
[!] From now on use test001.xcworkspace.
と流れをまとめましたが、TrunkのおかげでPodライブラリの公開が全自動かつ即公開となりました。これからもTrunkを利用してPodライブラリをどんどん公開できるようがんばります!